Fairies have always fascinated me.
One of our favorite places to go when my girls were small was the children's garden at Winterthur Museum. Whoever designed the Fairy Ring deserves an award on the magnitude of a Nobel Prize.
And at some point, we got our hands on a "Make your Own Flower Fairy Kit"
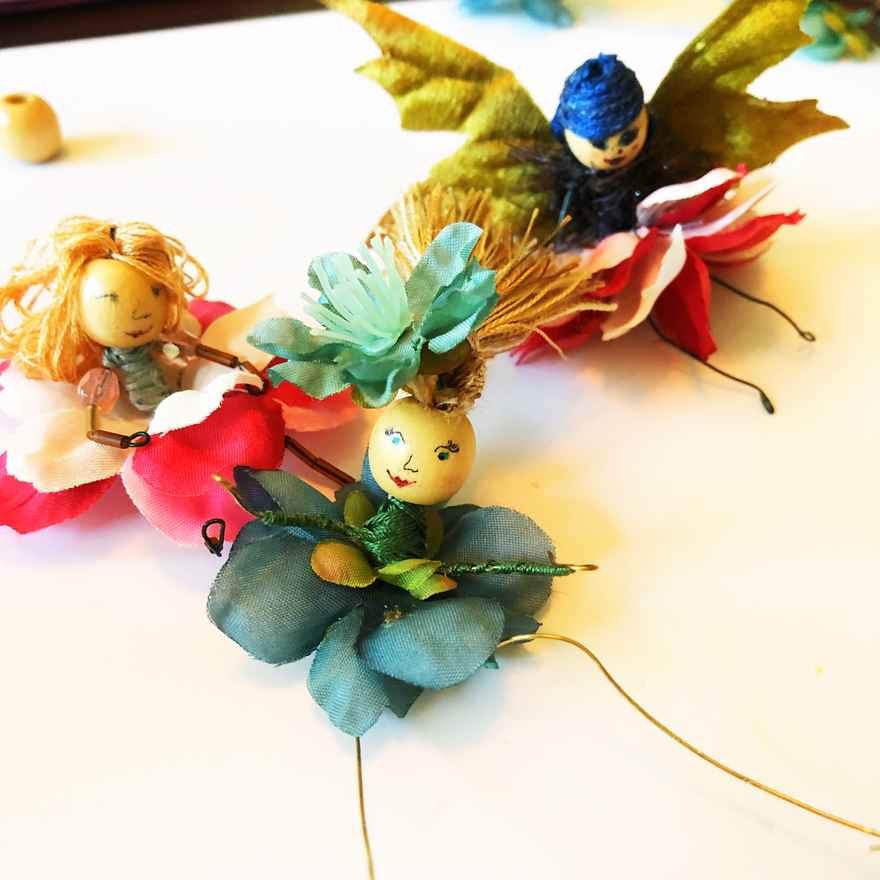
It didn't take us long to use up the parts and pieces in the kit and start to get creative. We found that so many leftovers from other projects could be transformed into these wonderfully whimsical creations. We found so many different uses for our fairies to bring a touch of whimsy to otherwise boring things. From decorating a lampshade, curtains, or perched atop a bulletin board. I think they might have even been made into pushpins or magnets for that board.
We added them to gift tags and napkin rings. (Although each one is so unique, they were awfully hard to part with). It became so easy to add in the appropriate hangers or attachments as part of the design which made them so versatile.
Last night, I got the overwhelming urge to put aside all of the things weighing on me. All of the things I "should" be doing and make some flower fairies.

Here is a quick tutorial:
What you need:
- 12mm Wooden Beads
- Fine tip Sharpie or 0.1 Micron Pen in black
- Permanent markers for eye color and lips
- Any small to medium gauge beading wire
- Tacky Glue or Hot Glue gun
- Asstd. cross-stitch/embroidery thread
- Assorted artificial flower stems with flower removed
- Random beads and baubles
Getting started:
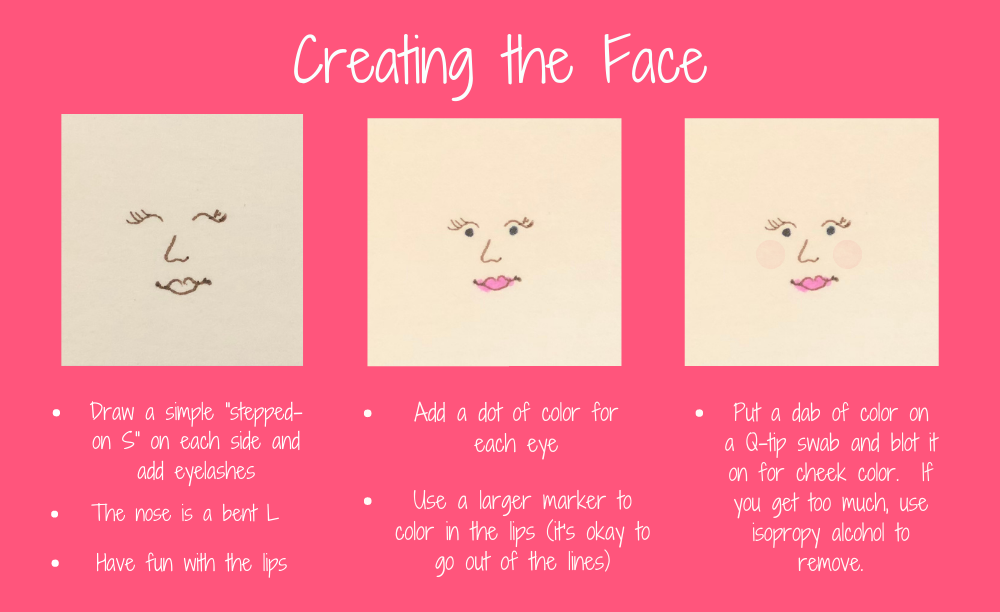
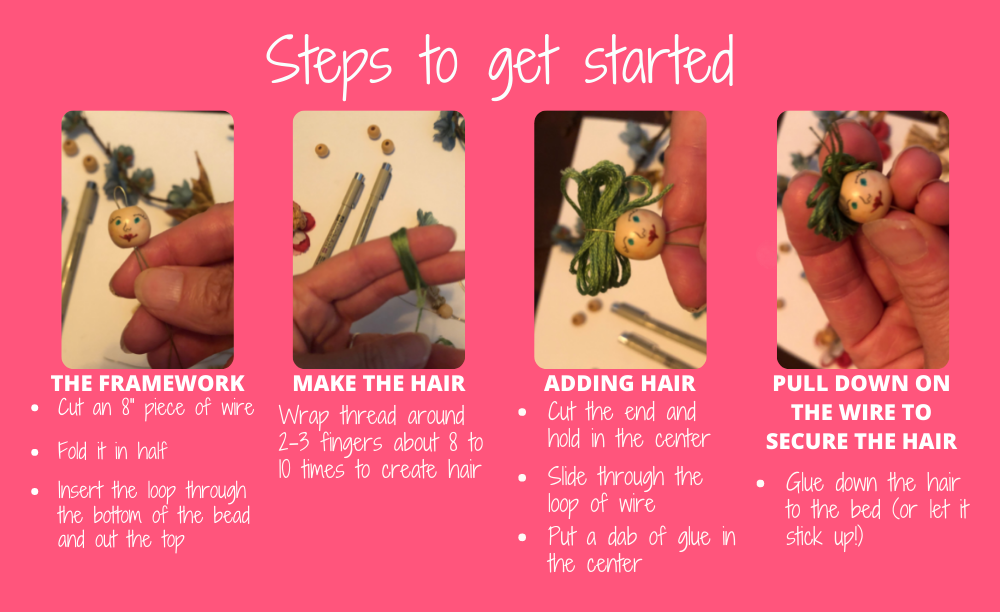
I like to draw lots of bead faces at once. Once I get in the flow each one gets better and better. I draw the outline with the fine tip pen. If you mess up, isopropyl alcohol will remove the ink. Practice a few times on a piece of paper before you pick up a bead.
Here is my face template:
Assembling the body:
You can use any items that you have laying around. This is just a general guideline.
Flower Fairies from Lynne Niehaus on Vimeo.
The wires that come out of the head will be the base of the body as well as the legs. You will want to keep them together as you create the body but then separate them with small beads once you have added the flower petal "skirt." Beads can be used on the arms as sleeves or the feet as shoes or however else you would like to embellish. I like to let the materials we are using be the guide. You can cut the leaves of the artificial flowers to make cool wings. And another trick is to snip the edges of the petals to create fringe. The legs can be wrapped with thread for a nice finishing touch.
These are basic guidelines. Let your imagination take over!
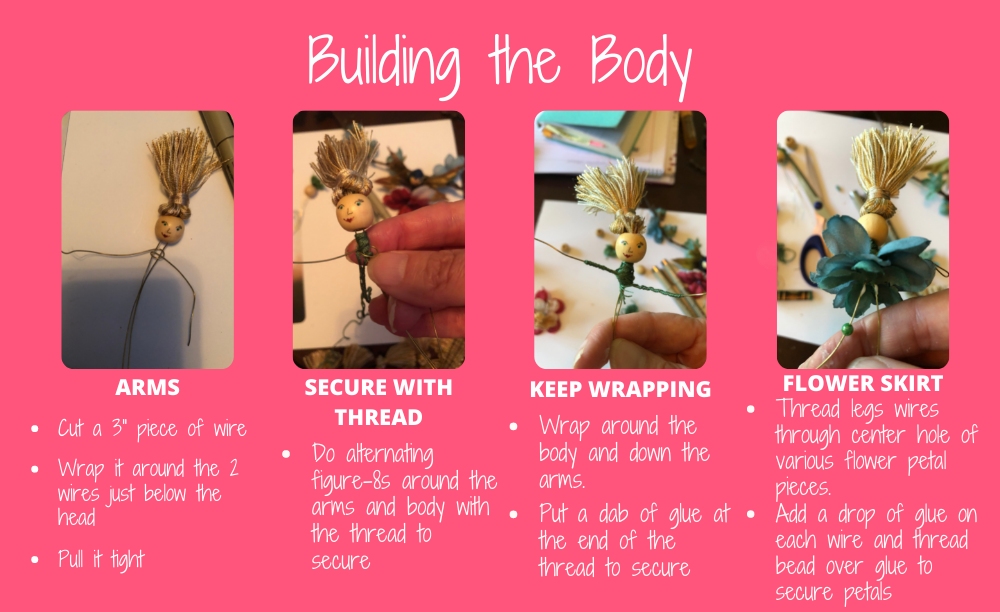
Make a loop at the ends of each wire to form the hands and feet. I like to pinch the loops oblong.
Now the only thing left is to ....
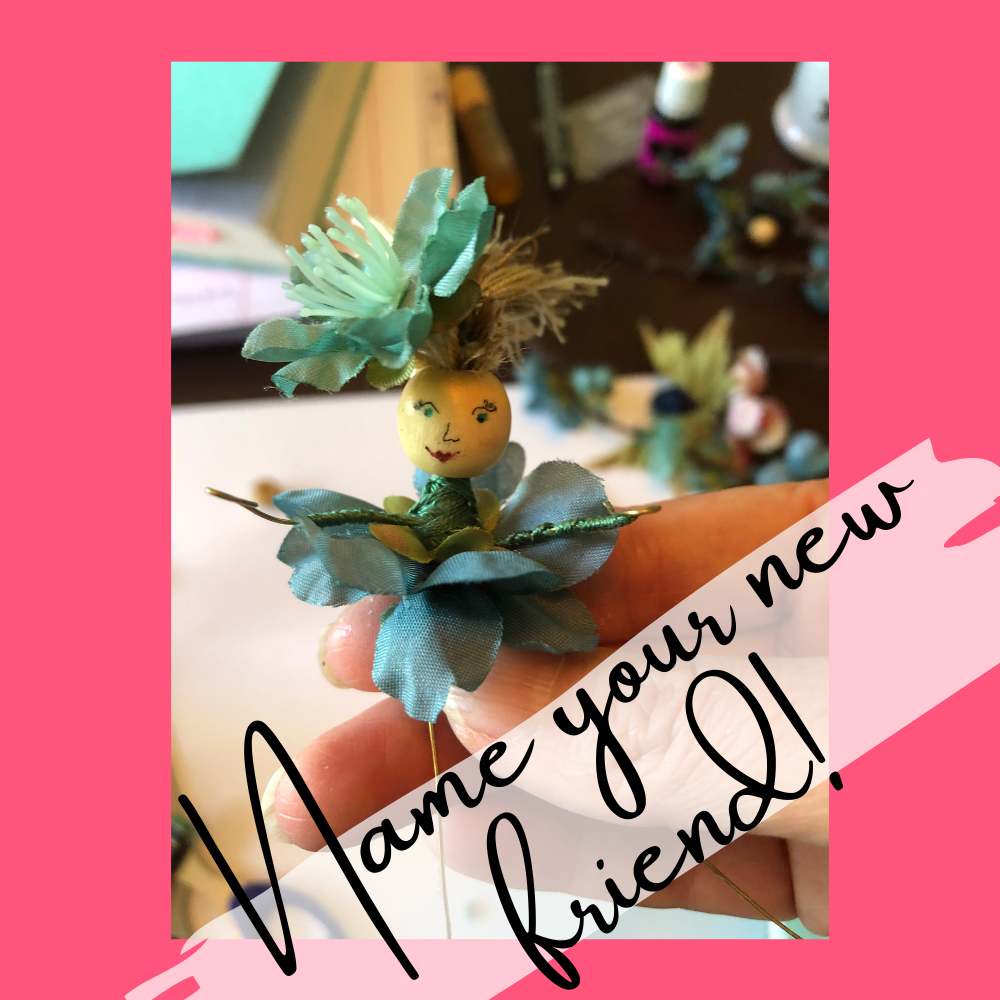
Have fun! Let your imagination go wild!

Are you on the Fun Project Friday List?
Get easy-to-do design projects that will make your daughter's room/ your room more beautiful AND more organized delivered each Friday to your inbox for FREE!
(You can unsubscribe at any time!)
Comments